
Kitchen and Bathroom Lighting Design in Portland & Beaverton: A Remodel Guide from Licensed Electricians
The single biggest upgrade in most remodels isn’t the countertop — it’s the light. Great kitchen and bathroom lighting design comes down to three layers (ambient, task, and accent), the right color temperature, and safe, to-code installation. This guide walks through exactly how to plan each one for a Portland or Beaverton remodel.
We’re Nexus Electrical Group, licensed electricians (Oregon CCB #226988) with 30 years of experience in the electrical field, and lighting is where a remodel comes to life: entryway chandeliers, dining room chandeliers, island pendants, recessed can lighting, under-cabinet task lighting, and vanity lighting that actually flatters. Here’s what works — and the code rules that protect your family.
What is layered lighting design?
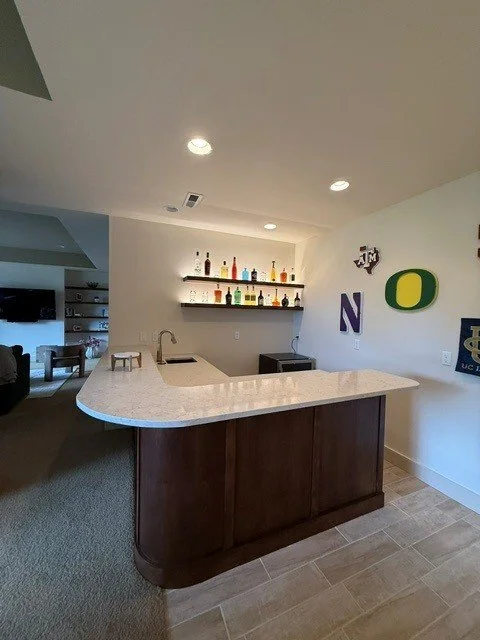
Layered lighting design is the practice of combining three types of light — ambient, task, and accent — so one room works for cooking, close-up work, and entertaining without ever feeling like an operating room. The American Lighting Association calls these the three layers of light, and every well-designed kitchen or bath uses all three:
Ambient lighting is the general illumination that fills the room — recessed can lights, ceiling fixtures, and chandeliers.
Task lighting puts focused light exactly where you work — under-cabinet strips over a countertop, pendants over an island, sconces at a vanity mirror.
Accent lighting adds drama and depth — toe-kick lights, glass-cabinet lighting, or a statement chandelier that doubles as art.
Put each layer on its own dimmer and one kitchen becomes five rooms: bright for prep, moderate for family dinner, low and warm for a glass of wine after the kids are in bed.
How should you light a kitchen remodel?
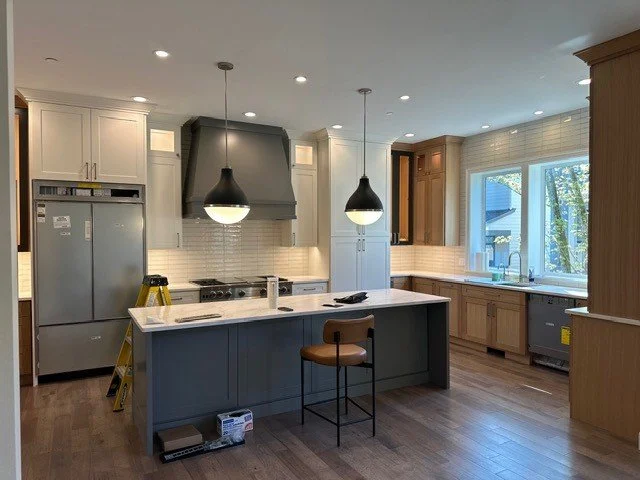
Plan a kitchen in three layers: recessed can lighting for even ambient light, pendants over the island for task light plus style, and under-cabinet LEDs so you’re never chopping vegetables in your own shadow. Each layer goes on its own dimmer switch.
Recessed (can) lighting
Modern kitchens use 4-inch or 6-inch LED recessed cans. A reliable spacing rule of thumb: divide your ceiling height by two — an 8-foot ceiling wants cans roughly 4 feet apart. Keep perimeter cans about 24–30 inches off the wall so the light washes your upper cabinets instead of the back of your head. If insulation sits above the ceiling, the housings must be IC-rated (insulation contact) — a detail that matters for fire safety and one we check on every install.
Island and peninsula pendants
Hang pendants 30–36 inches above the countertop — low enough to light the surface, high enough to keep sightlines open. Odd numbers usually look best: three smaller pendants over a long island, one statement pendant over a compact peninsula. Leave roughly 30 inches between fixtures so they read as a set, not a cluster.
Under-cabinet task lighting
Under-cabinet LED strips are the highest-impact, lowest-cost layer in the whole kitchen. Mounted at the front edge of the upper cabinets, they erase the shadow your body casts on the counter and make the backsplash glow. Match their color temperature to your cans (more on that below) so the room reads as one designed space.
Kitchen zone-by-zone lighting guide:
General / ambient — 4″ or 6″ LED recessed cans. Spacing ≈ ceiling height ÷ 2; IC-rated housings; on a dimmer.
Island / peninsula — Pendants (odd numbers). 30–36″ above countertop; ~30″ between fixtures.
Countertops — Under-cabinet LED strips. Front-edge mounting; match color temp to cans.
Sink — Dedicated can or small pendant. Centered on the sink, on its own switch.
Breakfast nook — Chandelier or large pendant. On a dimmer for morning-to-evening range.
How should you light a bathroom remodel?
The vanity comes first: light your face, not the top of your head. Vertical sconces flanking the mirror at about eye level — roughly 65–70 inches off the floor — eliminate the harsh under-eye shadows that a single ceiling fixture creates. Add a sealed, wet-rated recessed light over the shower and warm dimmable ambient light for 2 a.m. trips, and the room is done right.
For makeup and shaving, choose bulbs with a CRI (color rendering index) of 90 or higher — skin tones look true instead of gray. And bathrooms are where electrical code earns its keep. The National Electrical Code (Section 410.10(D)) prohibits pendants, chandeliers, track lighting, and any cord- or chain-hung fixture within 3 feet horizontally and 8 feet vertically of the bathtub rim or shower threshold. Fixtures inside that zone must be rated for damp locations — and wet locations if shower spray can reach them. Bathroom receptacles also require GFCI protection. These aren’t suggestions; they’re the difference between a beautiful bathroom and a hazardous one, which is why this work belongs with a licensed electrician.
What size chandelier is right for an entryway or dining room?
Use the designer’s rule of thumb: add the room’s length and width in feet, and that number in inches is your chandelier’s ideal diameter. A 12 × 14-foot dining room wants a fixture roughly 26 inches across.
Dining rooms: size the chandelier about 12 inches narrower than the table’s width, and hang it 30–36 inches above the tabletop for an 8-foot ceiling — raise it about 3 inches for every additional foot of ceiling height.
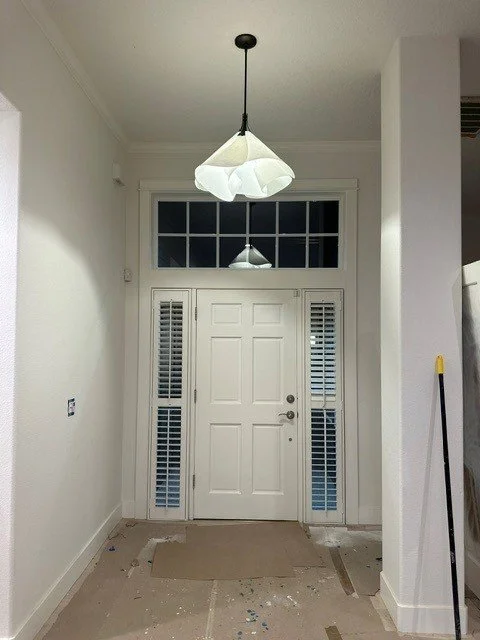
Entryways and foyers: keep the lowest point of the fixture at least 7 feet above the floor. In a two-story foyer, center the chandelier in the space and, if there’s a window above the door, position it so the fixture is visible from outside — it becomes part of your home’s curb appeal at night.
Weight and support: fixtures over 50 pounds can’t hang from a standard ceiling box — they need a listed fixture-rated box or brace anchored to structure. Heavy entryway chandeliers and two-story installs are exactly where a licensed electrician (and sometimes a lift) earns the fee.
Chandelier and pendant installation is some of our favorite work — you can see recent entryway and dining room installs on our projects page.
What color temperature and bulbs should you choose?
For most kitchens and bathrooms, 2700K–3000K is the sweet spot — warm enough to feel like home, clean enough to work by. Whatever you choose, keep it consistent: mixing 2700K cans with 4000K under-cabinet strips is the fastest way to make a new remodel look off.
Color temperature guide:
2700K (warm white) — Cozy, incandescent-like. Best for dining rooms, entryways, and ambient layers.
3000K (soft white) — Clean but still warm. Best for kitchens, bathrooms, and vanities.
3500–4000K (neutral/cool) — Crisp, commercial. Best for garages and workshops — use sparingly in living spaces.
Go LED everywhere. According to the U.S. Department of Energy, LEDs use up to 90% less energy and last up to 25 times longer than incandescent bulbs, and the average household saves about $225 a year in energy costs by switching — meaningful, since lighting accounts for around 15% of a typical home’s electricity use. Pair them with LED-compatible dimmers (older dimmers cause flicker) and every layer of your new lighting becomes adjustable.
Do you need an electrician and a permit for remodel lighting in Portland?
Yes. Any new circuits, new fixture boxes, or relocated wiring in Portland or Beaverton requires an electrical permit and inspection — swapping a bulb doesn’t, but adding six recessed cans and an island pendant circuit absolutely does. We pull the permit and meet the inspector, so it’s never your problem.
Two things we check before any remodel lighting plan is finalized:
Panel capacity. A remodel usually adds circuits, and many Portland-area homes still run on 100-amp service. We run a load calculation first — and if the panel is at its limit, our electrical panel upgrade service brings it to 200 amps, usually in a single day. Ask about our free peak-power-demand assessment.
Old wiring. In homes built before about 1950 — think Craftsman bungalows in NE and SE Portland, Ladd’s Addition, Irvington, and older Beaverton neighborhoods — opening a ceiling for new cans often uncovers knob-and-tube wiring. It’s ungrounded, it can’t be buried in insulation, and insurers increasingly won’t cover it. Our knob-and-tube replacement service handles it as part of the remodel, while the walls are already open — the cheapest time you’ll ever have to do it.
Why Portland and Beaverton homeowners choose Nexus Electrical Group for lighting design
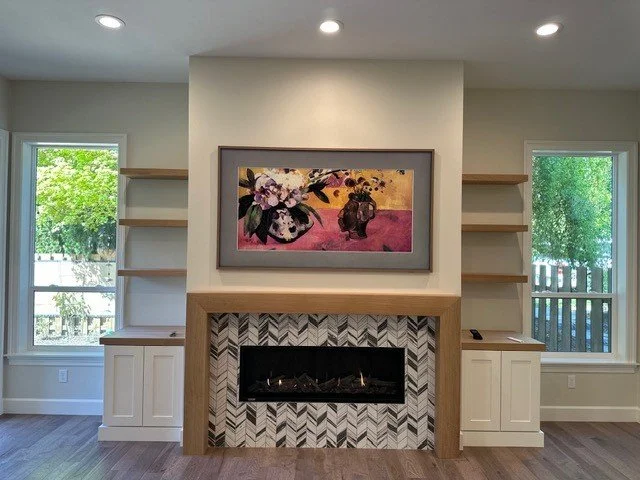
Kitchen and bathroom lighting design in Portland is equal parts art and code, and we bring both: 30 years in the electrical field, an Oregon CCB license (#226988), and a portfolio of entryway chandeliers, dining room chandeliers, island pendants, recessed lighting, and vanity installs across the Portland metro. We work directly with homeowners, and just as happily alongside your general contractor or designer — laying out the plan, pulling the permit, and dialing in dimmers before we leave.
Planning a remodel? Get the lighting plan right before the drywall goes up. Call or text 971-410-7073, book a free estimate online, or claim $300 off your project.
Frequently asked questions
How many recessed lights does a kitchen need?
Divide your ceiling height by two to get spacing in feet — an 8-foot ceiling wants cans about 4 feet apart. A typical 10 × 12-foot kitchen lands at six to eight 4-inch LED cans, plus island pendants and under-cabinet lighting so no single layer has to do all the work.
What lighting is allowed over a bathtub or shower?
The National Electrical Code prohibits pendants, chandeliers, track lighting, and cord-hung fixtures within 3 feet horizontally and 8 feet vertically of a tub rim or shower threshold. Fixtures inside that zone must be damp-rated — and wet-rated if shower spray can reach them. Sealed recessed shower trims are the standard solution.
How high should a dining room chandelier hang?
Hang it 30–36 inches above the tabletop with an 8-foot ceiling, and raise it about 3 inches for each additional foot of ceiling height. For size, choose a fixture about 12 inches narrower than your table’s width so no one bumps their head standing up.
What is the best color temperature for kitchens and bathrooms?
Stick to 2700K–3000K — warm enough to feel inviting, clean enough for real work — and keep every fixture in the room at the same temperature. At bathroom vanities, also look for bulbs with a CRI of 90 or higher so skin tones look accurate for makeup and shaving.
Do I need a permit to add lighting in Portland or Beaverton?
Yes — new circuits, new fixture boxes, or relocated wiring require an electrical permit and inspection in both Portland and Beaverton. Simply replacing an existing fixture on the same box generally doesn’t. Nexus Electrical Group pulls the permit and schedules the inspection as part of every lighting job.
Can my electrical panel handle new remodel lighting?
LEDs draw little power, but remodels usually add circuits, and many older Portland-area homes still have 100-amp service. A load calculation gives the real answer. Nexus Electrical Group offers a free peak-power-demand assessment, and if the panel is maxed out, a 200-amp upgrade is usually a one-day job.
Is it worth switching everything to LED during a remodel?
Yes. According to the U.S. Department of Energy, LEDs use up to 90% less energy and last up to 25 times longer than incandescent bulbs, saving the average household about $225 a year. A remodel is the cheapest moment to convert, since fixtures and dimmers are being replaced anyway.
Written by the team at Nexus Electrical Group, licensed electricians (Oregon CCB #226988) serving Beaverton and Portland, Oregon, with 30 years of experience in the electrical field. We install EV chargers, upgrade electrical panels, remove knob-and-tube wiring, install backup generators, and design remodel lighting across the Portland metro.
Published August 2, 2026 · Last updated August 2, 2026